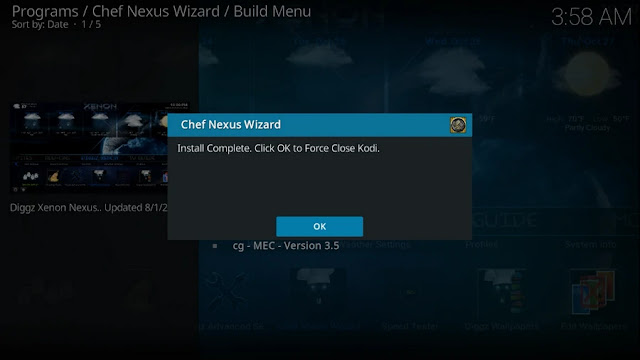
How To Install Diggz Xenon Kodi Build 2023 (Latest Version) on Firestick/Android

This tutorial with step-by-step Instructions will show you How to Install Diggz Xenon Kodi Build on your preferred streaming device.

The Diggz Xenon Kodi Build is the most well-known of the several Kodi builds available on Diggz. All Kodi platforms, including those with minimal hardware like Firestick, and Android TV Box are compatible with this Kodi Build.

How To Install Diggz Xenon Kodi Build on Firestick/Android

Which Diggz Build is Best?

Diggz Xenon Kodi Build is one of the most popular Kodi Builds available, as it’s full of content, and categories, and has a user-friendly interface.

⚠️ WARNING!

Your streaming activity is actively tracked by your Internet Service Provider, app/addon devs, and government through your identifying IP address.
Currently, Your IP Address is:


103.199.191.174


Stream and download anonymously by using NORD VPN.
IPVanish will encrypt your connection to the Internet and mask your IP address, so you will remain 100% anonymous.


IPVanish allows you to use your account on unlimited Internet-connected devices. Also, it Comes with a 30-day Money-Back Guarantee.


For these reasons and more, Diggz Xenon Kodi Build is considered one of the Best Kodi Builds by Firestick zone Kodi Builds.


Prior to installing any Kodi Build, we always recommend resetting Kodi to default settings. This can be easily done on any device you have Kodi installed.

Install Diggz Xenon Step-by-Step Video Tutorial:

How To Install Diggz Xenon Kodi Build:


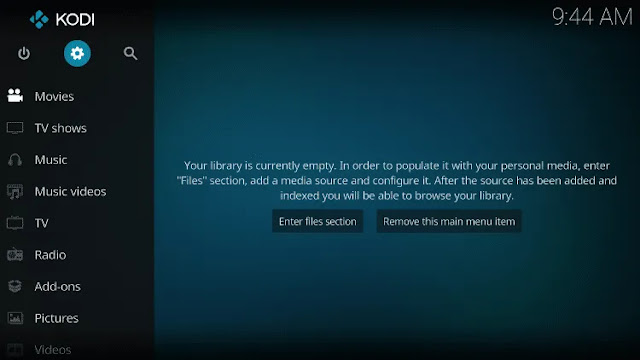
  • Launch Kodi
  • Click the settings icon


Click the settings icon


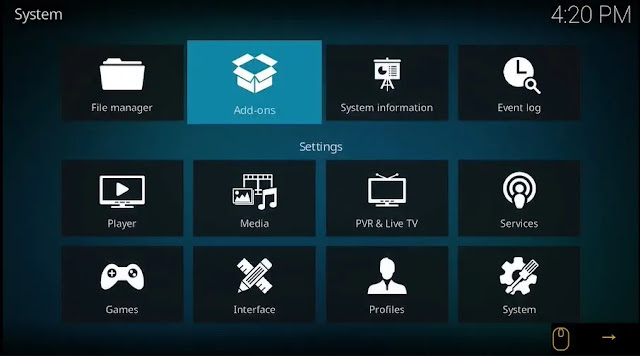
  • Click System


Click System


  • Hover over Add-ons menu item and turn on Unknown sources if not already on


Hover over Add-ons menu item and turn on Unknown sources if not already on


  • Click Yes


Click Yes


  • Click back on remote to go back to the System page
  • Select File Manager


Select File Manager


  • Click Add source


Click Add source


  • Click <None>


Click <None>


  • Type the following URL exactly as shown here: https://diggz1.me/diggzrepo/

Note: The referenced link is the official URL of this app/addon. EKB does not own or operate any streaming website, service, app, or addon, and has no affiliation with any developers.
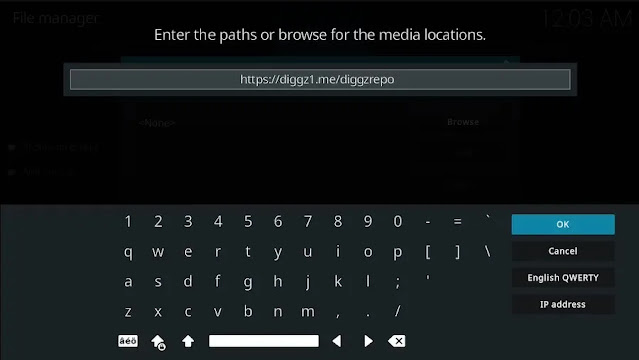
Type the following URL exactly as shown here: https://diggz1.me/diggzrepo/


  • Highlight the box under the source that you just typed in and enter a name for this media source
  • Type “diggzrepo” or any other name you would like to identify this source as and click OK


Type “diggz” or any other name you would like to identify this source as and click OK


  • Click the back button on your remote or keyboard until you are back on the System screen
  • Choose Add-ons


Choose Add-ons


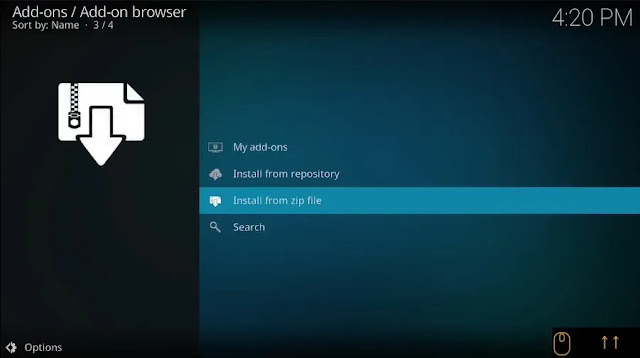
  • Click Install from zip file


Click Install from zip file


  • Click Yes


Click Yes


  • Choose “diggzrepo” or another name you assigned the media source in the previous step


Choose “diggzrepo” or another name you assigned the media source in the previous step


  • Click the zip file URL – Diggz_Repo.zip
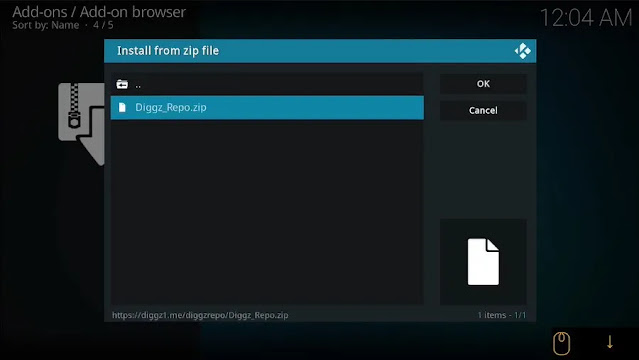
 

Click the zip file URL – Diggz_Repo.zip


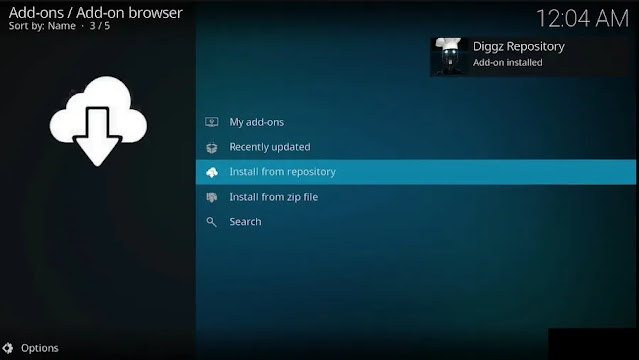
  • Wait for the “Diggz Repository Build Wizard Add-on installed” message to appear. You may have to be patient for a minute or two
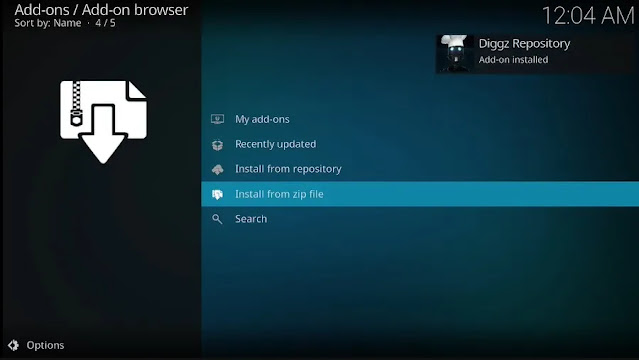
 

Wait for the “Diggz Repository Build Wizard Add-on installed” message to appear. You may have to be patient for a minute or two


  • Click Install from repository


Click Install from repository


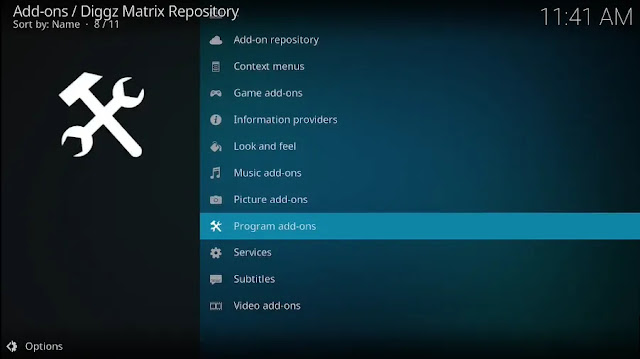
  • Select Diggz Repository
Select Diggz Repository
  • Select Program Add-ons


Select Program Add-ons


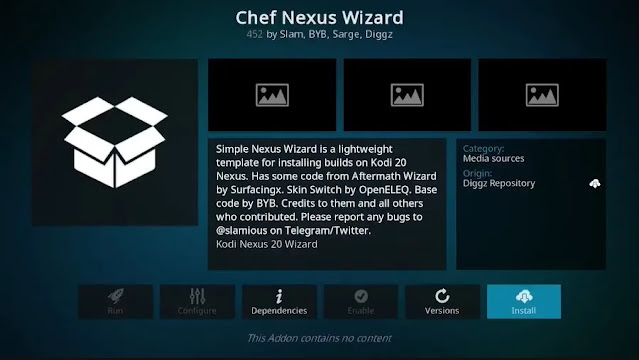
  • Select Chef Nexus Wizard or Chef Matrix Wizad if you use the Kodi 19 Matrix.
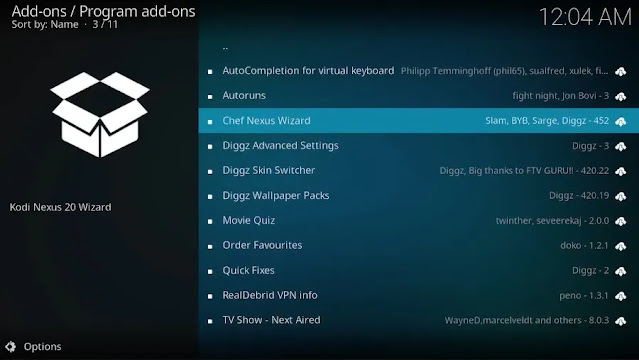
 

Select Chef Nexus Wizard


  • Click Install


Click Install


  • Wait a few minutes for “The Chef Wizard Add-on installed” message to appear.


Wait a few minutes for “The Chef Wizard Add-on installed” message to appear.


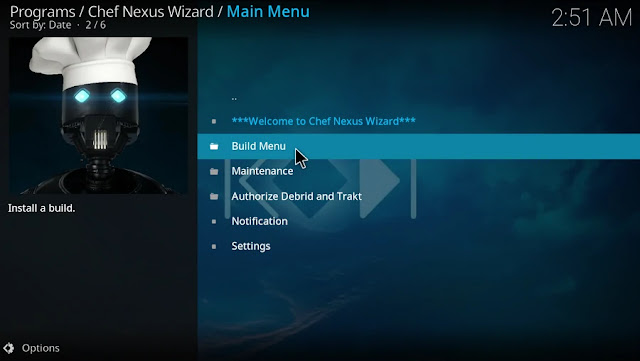
  • Select Chef Nexus Wizard and Click Open.
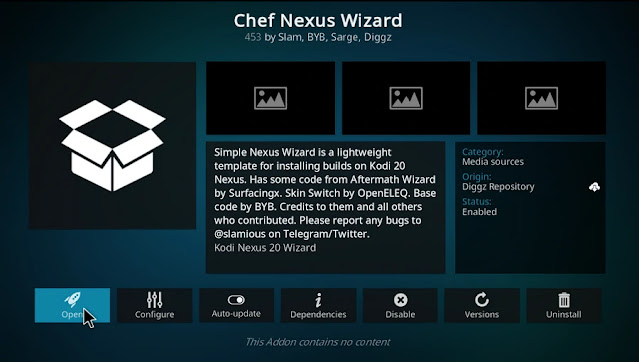
Select Chef Nexus Wizard and Click Open.
  • Select build Menu


Select build Menu


  • Choose Diggz Xenon Kodi Build


How To Install Diggz Xenon Kodi Build on Firestick/Android


  • Select Continue


How To Install Diggz Xenon Kodi Build on Firestick/Android


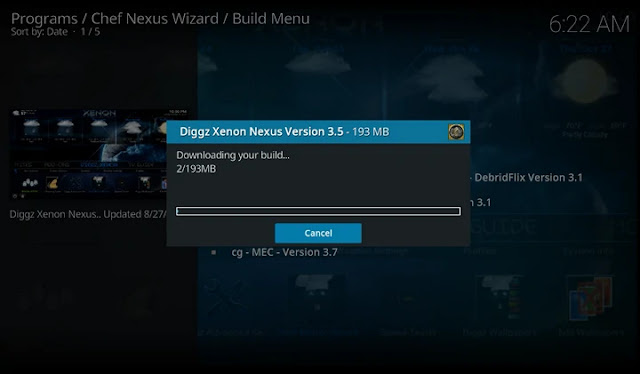
  • Wait for the Xenon build to download


How To Install Diggz Xenon Kodi Build on Firestick/Android


  • Wait for the Extracting files.
Diggz Xenon Kodi Build
  • Once the download is complete, reopen Kodi from the Home menu
  • That’s it! The diggz xenon nexus build is now successfully installed.


How To Install Diggz Xenon Kodi Build on Firestick/Android


  • Once at the main screen make sure to allow the menus to build and add-ons to install. This may take a few minutes so be patient.
Read: How to Install Planet Diggz Kodi Build.

How to Update Diggz Xenon Build?

If you own an old version of diggz xenon Build and you don’t know what is the latest diggz xenon build, it’s simple, the update will show as a pop-up notification on your screen asking you if you want to switch to the latest update.
 
  • If you still don’t get the update, here is what you need to do.
  • Go to the Addons section and select Install from repository.
  • Find the Diggz Repository and click on it.
  • Select Program Addons.
  • Click on Chef Nexus Wizard.
  • Select Auto Update and tick on it to install the new version of xenon kodi build when it’s available.
  • you can also know what version of diggz xenon build you have by clicking on Configure, and check the installed version, also you can disable the update notifications from there.

How to use Diggz Xenon Build?


Kodi with a build isn’t anything that different from Kodi without one, except for the overhaul of the UI. That’s wonderful news since it shows that even a newcomer may quickly become accustomed to a Kodi setup.
I’ll be using Diggz Xenon Build as an example throughout this instruction. With a few small exceptions, the layout of each construction is mostly the same. Even if you have a different build, utilizing this example will help you understand how to use any build in general.
This is how Kodi’s home screen appears while using the Diggz Xenon Build. This skin is clearly much more bright and exciting than the default.
As you can see, the Diggz Xenon home screen has a Menu bar running down the center and a contextual submenu bar beneath it.
Related submenu items are displayed when you choose an item in the main Menu bar. For instance, when I choose Movies, the associated options Search, Trending, New Releases, etc. are displayed.
Check out how the submenus alter as you choose different options like TV Shows, IPTV, and Sports.
Recall that I indicated that builds arrive with addons already installed.
In the menu bar, I have chosen the Movies option. The list of Movie addons is located at the bottom. These are some of the add-ons that come pre-installed with Diggz Xenon.
The add-ons that host TV Shows appear when I choose.
The list of add-ons that you may access from the Diggz Xenon home screen may not be all-inclusive. There may be more add-ons in a build than what can be displayed on the main screen. Here is what you may do if you wish to investigate further add-ons:
In the menu bar, pick Main Menu (do not click; simply select). Clicking will provide an entirely new menu of choices.)
Next, choose Video add-ons from the dropdown below.
The full list of the pre-installed video add-ons for the Diggz Xenon Build can be found here.

Leave a Reply

Your email address will not be published. Required fields are marked *